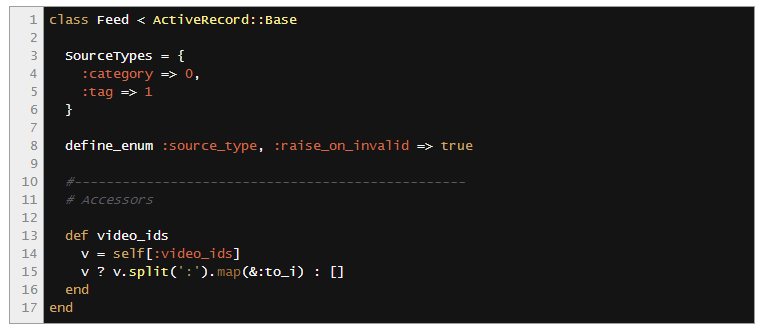
SyntaxHighlighter Evolved allows you to easily post syntax-highlighted code to your site without having to escape the code or anything. It uses the SyntaxHighlighter JavaScript package by Alex Gorbatchev to do the highlighting and supports all of the package’s parameters via shortcode attributes.
For a list of supported languages (most widely used languages are supported), see the WordPress.com support document.
Example Code Output:
Note that there are various different color schemes available.
PHP Code Example
This line is highlighted.
If you prefer, you can hide the line numbering and other UI stuff with the “light” mode, for example:
[php light=”true”]your code here[/php]
There are many other parameters and defaults you can control via the Settings page or the shortcode parameters. Full details and instructions are located at the bottom of the Settings page.
https://en.support.wordpress.com/code/posting-source-code/
Posting Source Code
While WordPress.com doesn’t allow you to use potentially dangerous code on your blog, there is a way to post source code for viewing. We have created a shortcode you can wrap around source code that preserves its formatting and even provides syntax highlighting for certain languages, like so:
1
2
3
4
#button {
font-weight: bold;
border: 2px solid #fff;
}
To accomplish the above, just wrap your code in these tags:
[code language=”css”]
your code here
[/code]
The language (or lang) parameter controls how the code is syntax highlighted. The following languages are supported:
actionscript3
bash
clojure
coldfusion
cpp
csharp
css
delphi
erlang
fsharp
diff
groovy
html
javascript
java
javafx
matlab (keywords only)
objc
perl
php
text
powershell
python
r
ruby
scala
sql
vb
xml
If the language parameter is not set, it will default to “text” (no syntax highlighting).
Code in between the source code tags will automatically be encoded for display, you don’t need to worry about HTML entities or anything.
Configuration Parameters
The shortcodes also accept a variety of configuration parameters that you may use to customize the output. All are completely optional.
autolinks (true/false) — Makes all URLs in your posted code clickable. Defaults to true.
collapse (true/false) — If true, the code box will be collapsed when the page loads, requiring the visitor to click to expand it. Good for large code posts. Defaults to false.
firstline (number) — Use this to change what number the line numbering starts at. It defaults to 1.
gutter (true/false) — If false, the line numbering on the left side will be hidden. Defaults to true.
highlight (comma-seperated list of numbers) — You can list the line numbers you want to be highlighted. For example “4,7,19”.
htmlscript (true/false) — If true, any HTML/XML in your code will be highlighted. This is useful when you are mixing code into HTML, such as PHP inside of HTML. Defaults to false and will only work with certain code languages.
light (true/false) — If true, the gutter (line numbering) and toolbar (see below) will be hidden. This is helpful when posting only one or two lines of code. Defaults to false.
padlinenumbers (true/false/integer) — Allows you to control the line number padding. true will result in automatic padding, false will result in no padding, and entering a number will force a specific amount of padding.
title (string) — Set a label for your code block. Can be useful when combined with the collapse parameter.
Here’s some examples of the above parameters in action:
8
9
10
11
This line is not highlighted.
This line is highlighted.
This line is highlighted.
This line is not highlighted.
0001
This is a short snippit of
with padlinenumbers set to 4.
And here’s a larger code block to see it all in action. It is set to the PHP language with “htmlscript” enabled and line number 12 highlighted.
24
WordPress.com Code Example
This line is highlighted.
This line is very very very very very very very very very very very very very very very very very very very very very very very very very very very very very very very very very very long.
↑ Table of Contents ↑
Credits
Alex Gorbatchev’s SyntaxHighlighter project was used in the implementation of this feature. If you are a WordPress.org user and would like to use this feature on your self-hosted blog, it is available as a plugin.
개발자의 블로그라면, 당연 프로그램 코드가 들어가기 마련이다. 코드를 가독성있게 보여주는 것은 매우 중요하다.
그래서 인지 워드프레스에는 수많은 code 구문 강조 (syntax highlighter) 플러그인이 존재하는데 그중에 나에게 딱 맞는 것이 무얼까 고민을 많이 했다.
내가 원하는 플러그인의 조건은,
많이 사용되고 꾸준히 관리되고 있어서 나중에 지원 중단으로 곤란한 일이 없는 것
나중에 다른 플러그인으로 갈아탈 수 있는 지
다양한 기능과 디자인 지원
간결한 기능
아래는 내가 조사해본 플러그인들 이다
WP-Syntax
현재 내 블로그에 깔려 있는 플러그인이다. 위 조건중 1번 조건중 ‘많이 사용되는지’는 다운로드 숫자로 판별하고, ‘계속 지원되는 지’는 최근 업데이트 날짜를 기준으로 했다.
장점 :
20만 이상의 많은 다운로드 숫자와 1년 전 업데이트 되었으므로 꽤 유명하고 관리도 잘 되고있다.
사용법이 간결하고 pre 태그를 응용하고 있어서 나중에 플러그인을 삭제해도 pre 태그 안에 코드가 보이게 된다.
단점 :
디자인이 별로 이쁘지 않다.
기능이 별로 없다.
SyntaxHighlighter Evolved
wordpress.com 이 사용하는 구문강조 엔진과 같은 엔진을 사용하는 플러그인 이라고 한다.
장점
20만에 육박하는 널리 쓰이는 엔진이고 마지막 업데이트 된지 1년이 안됨
wordpress.com 이 쓰는 엔진
단점
[php]code here[/php] 와 같은 언어별 다른 문법을 사용해서 코드를 감싸야 함
-> 나중에 다른 플로그인으로 옮겨가기 힘듬
디자인이 선택 불가능 하고 이쁘지 않음
CodeColorer
가장 많은 기능과 디자인을 지원하는 플러그인이다.
장점
다양한 디자인 템플릿에서 선택 가능하고 수많은 기능들 지원
로 시작해서 나중에 다른 플러그인 문법으로 교체하기 쉬움
5만명의 무난한 다운로드와 높은 별점
단점
??
그 밖에도 WP-SynHighlight 와 같이 다양한 기능을 제공하나 지저분해 보이는 플러그인, 다양한 종류의 플러그인이 있었고 [6 Important Syntax Highlighter WordPress Plugins][6] 등의 사이트를 통해 많은 것을 찾아보았지만, 내가 선택한 것은 CodeColorer 이다.

